Select a trading day to view all Scanner results, chart evidence, and market explanations.
1 Scanners Available
Every trader dreams of catching a move where the risk is tiny, but the reward is massive.
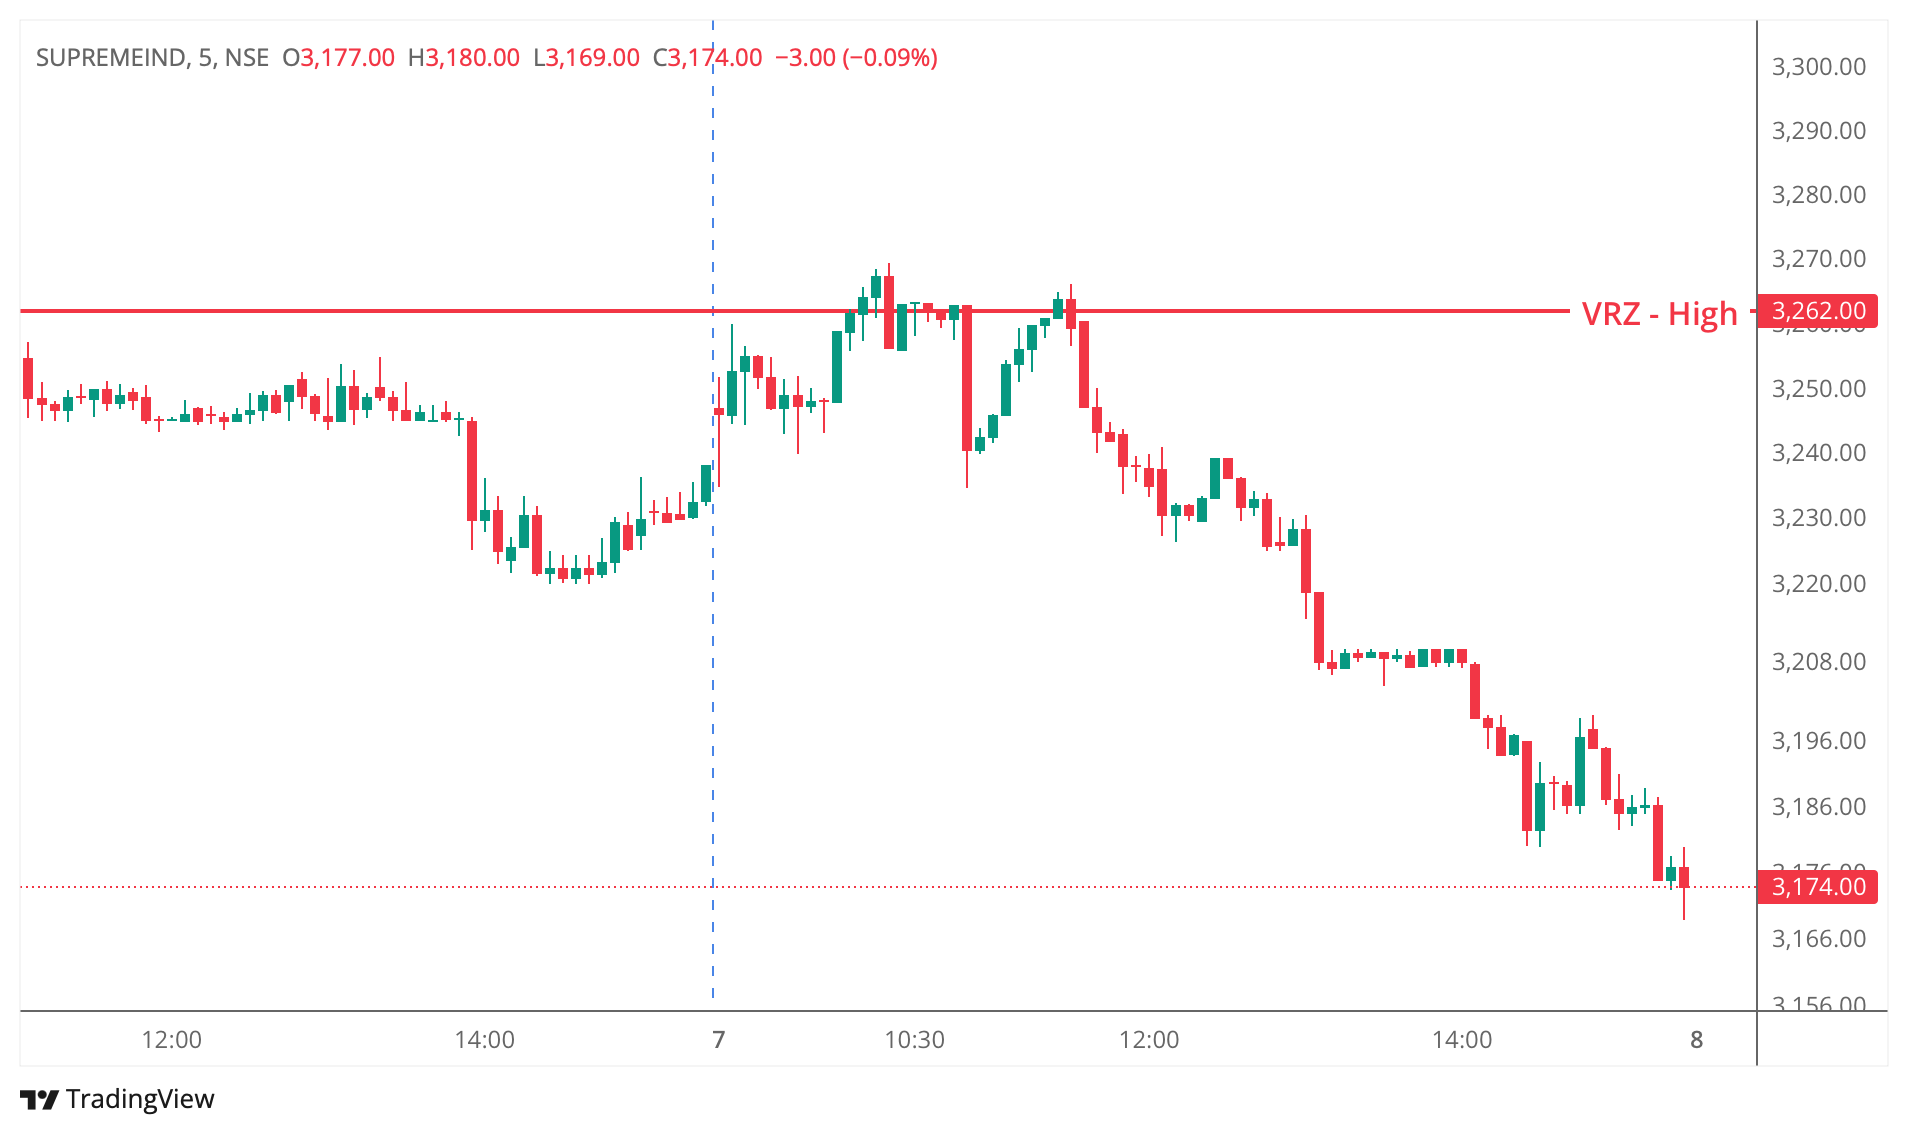
On SUPREMEIND (5-minute chart), the BOF (Breakout Failure) setup delivered exactly that—a clean rejection at resistance that eventually turned into a 1:10 Risk-Reward opportunity.
Here's how it unfolded.
The stock rallied strongly into a previously marked VRZ High (Validation Resistance Zone) around 3262.
Instead of continuing higher, price showed a classic BOF behavior:
This failure wasn't just another red candle.
It was a signal that trapped breakout buyers were now becoming sellers.
That shift in market psychology is exactly what BOF is designed to identify.
Once BOF confirmation appeared,
Entry: After confirmation below the failed breakout.
Stop Loss: Just above the BOF high.
This kept the risk extremely small.
Most traders struggle because their stop losses are too wide.
BOF naturally allows for tight stops, which is why even an average move can produce exceptional Risk-Reward ratios.
After the trigger,
price never managed to reclaim the resistance.
Instead it formed:
The stock kept trending lower throughout the session.
Eventually, the trade offered approximately 10 times the initial risk.
This is the kind of trade that doesn't happen because of prediction.
It happens because of waiting for confirmation and managing risk correctly.
Several factors aligned perfectly.
Price tested a well-defined resistance zone where sellers were already waiting.
The market attempted to move higher.
It failed.
False breakouts often lead to fast moves in the opposite direction because trapped buyers rush to exit.
The invalidation point was obvious.
A small stop created the possibility of a very large Risk-Reward.
After the BOF trigger, sellers stayed in control.
Instead of trying to catch every swing, simply following the trend allowed the trade to develop naturally.
Many traders focus on finding the "perfect" entry, believing that's what creates extraordinary returns.
In reality, the entry only creates the opportunity—your trade management determines the outcome.
This SUPREMEIND setup offered a small-risk entry because the BOF invalidation level was clearly defined. Once the trade moved in the expected direction, there was no reason to fight the trend or exit simply because the position was in profit.
The market rewarded traders who stayed disciplined.
A 1:10 Risk-Reward trade doesn't require predicting how far the stock will move. It requires following a simple process:
You won't capture a 1:10 move on every trade—and that's perfectly fine. But if you consistently take high-quality BOF setups with controlled risk, even a handful of extended winners can have a significant impact on your overall trading performance.
The objective isn't to force big winners. It's to create the conditions where big winners are possible.
Before taking any BOF trade, ask yourself:
✅ Is there a well-defined breakout level?
✅ Did price fail to sustain above that level?
✅ Is the stop loss small and logical?
✅ Does the reward justify the risk?
If all four answers are "Yes," the setup deserves attention.

This SUPREMEIND trade is a perfect reminder that trading isn't about finding dozens of opportunities every day.
It's about identifying high-probability setups where:
One well-executed BOF trade can outperform several mediocre trades.
The goal isn't to be right on every trade.
The goal is to ensure that when you're right, your winners are significantly larger than your losers.